Easy Homemade Peanut Butter Cups: Better Than Reese's!
There's a universally acknowledged truth in the world of sweets: the combination of rich chocolate and creamy peanut butter is pure magic. For many, the iconic Reese's Peanut Butter Cup has been a beloved go-to. But what if we told you that magic could be even more enchanting, more personalized, and incredibly easy to conjure right in your own kitchen? Welcome to the wonderful world of homemade peanut butter cups – a treat so superior, so customizable, and so utterly delicious, you'll wonder why you ever settled for anything less.
Why Go Homemade? Unlocking Superior Flavor and Purity
The allure of a homemade treat goes far beyond just the taste; it's about control, quality, and the sheer joy of creation. When you craft your own homemade peanut butter cups, you're not just making a dessert; you're elevating an experience.
The Allure of Pronounceable Ingredients
One of the most compelling reasons to make these irresistible chocolate-peanut butter delights yourself is the ingredient list. Imagine a dessert crafted from just six, readily available, easy-to-pronounce ingredients. No preservatives, no artificial flavors, no baffling fillers – just pure, unadulterated goodness. This stands in stark contrast to many store-bought alternatives, offering a peace of mind that only comes from knowing exactly what you and your loved ones are enjoying.
Beyond the Basic: Customizing Your Perfect Bite
This is where homemade truly shines. While commercial peanut butter cups offer a consistent experience, your homemade version can be tailored to your precise preferences. Here’s how you can elevate your homemade peanut butter cups:
- A Touch of Vanilla: A splash of vanilla extract in the peanut butter filling transforms it from simple to sublime, adding depth and warmth that complements the chocolate beautifully.
- Rich Dark Chocolate: While milk chocolate is a classic, opting for a high-quality dark chocolate lends a sophisticated bitterness that perfectly balances the sweet, creamy filling. It’s a game-changer for a more grown-up palate.
- A Sprinkle of Flaky Salt: This seemingly small addition makes a huge impact. A delicate sprinkle of flaky sea salt on top not only looks appealing but provides a delightful crunch and a crucial counterpoint to the sweetness, enhancing all the other flavors.
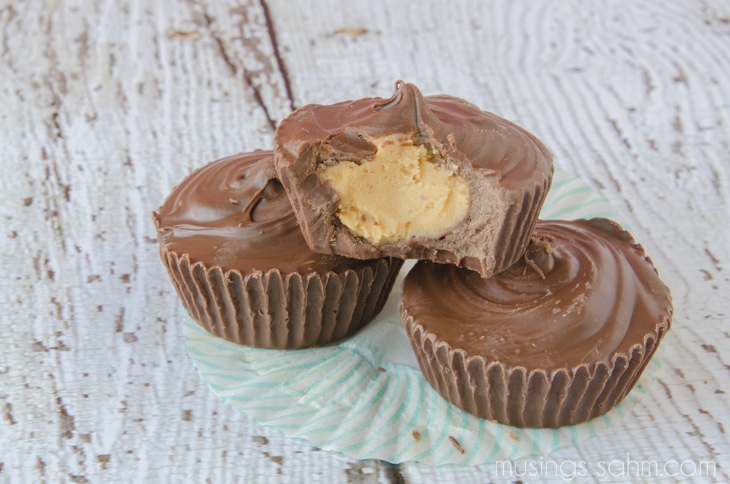
- The Magic of Graham Cracker Crumbs: For a filling that holds its shape beautifully and offers a delightful textural contrast, incorporating a small amount of graham cracker crumbs is genius. It helps to firm up the peanut butter mixture, preventing any unwelcome oozing when you take that first glorious bite.
The Joy of Creating: From Kitchen to Gift Box
There’s something incredibly satisfying about offering guests a chocolate confection you've made with your own hands. Whether it's a quiet Tuesday evening treat or a show-stopping dessert for a holiday gathering, the pride you feel is palpable. These homemade peanut butter cups are not just delicious; they’re a conversation starter, a heartwarming gift, and a perfect activity to involve the kids. Imagine their delight in helping assemble these treats, knowing they’re contributing to something truly special – especially during the festive season, when homemade food gifts are cherished.
The Secret to Success: Mastering Your Ingredients
While the recipe is simple, a few key ingredient choices and techniques can make all the difference in achieving that "better than Reese's" status.
The Unsung Hero: Unsalted Butter for Precision
When it comes to baking and dessert making, consistency is king, and unsalted butter is your loyal subject. Using unsalted butter provides a clean, neutral baseline, ensuring your dessert’s flavor profile remains exactly where you want it. Salted butter, on the other hand, can vary wildly in its sodium content from brand to brand. This means a batch made with one brand might be perfectly balanced, while another could turn out oddly briny. By starting with unsalted butter and adding salt yourself, you gain complete control over the flavor. It’s the same principle as using a kitchen scale for precise measurements – it’s a small choice that leads to predictable, delicious results every single time. For more on perfecting your flavor, you might want to Master Homemade Peanut Butter Cups: Control Your Flavor.
Choosing Your Chocolate: Dark vs. Milk
The type of chocolate you select will significantly influence the final taste. While milk chocolate offers a classic, sweeter profile, many enthusiasts find that a good quality dark chocolate (around 60-70% cacao) provides a depth and slight bitterness that perfectly complements the rich peanut butter filling. It elevates the entire experience, moving your homemade peanut butter cups from a simple sweet to a gourmet delight.
The Magic of Graham Cracker Crumbs
As mentioned, graham cracker crumbs are more than just a flavor enhancer; they're a structural genius. By adding them to your peanut butter filling, you create a mixture that is both creamy and firm enough to hold its shape. This prevents the filling from becoming too soft or oozing out when the cups are at room temperature or bitten into, ensuring a perfectly clean and satisfying experience.
Simple Steps for Irresistible Homemade Peanut Butter Cups
Making these treats is surprisingly straightforward, requiring about 15 minutes of active work before the chilling process takes over. Here’s how you can achieve perfection:
Melting Chocolate Like a Pro: The Gentle Double Boiler Method
Achieving perfectly smooth, glossy chocolate is key. The best way to do this is with a double boiler. Simply set a heatproof glass bowl over a saucepan containing an inch or two of simmering water, ensuring the bottom of the bowl does not touch the water. The gentle steam rising from the water will slowly and evenly melt the chocolate, preventing it from seizing or burning. While professional tempering involves precise temperature control, for these delicious homemade peanut butter cups, simply melting the chocolate gently and stirring it well until just a few small pieces remain will give you a beautiful, shiny finish and a satisfying snap.
Assembly Made Easy
The assembly is where the fun truly begins, and it's perfect for little helpers. Line a muffin tin with paper liners. Spoon a small amount of melted chocolate into the bottom of each liner, swirling to coat the base. Chill briefly to set. Next, roll your peanut butter filling into small balls and flatten them slightly before placing them onto the chocolate bases. Top with another spoonful of melted chocolate, ensuring the peanut butter is fully covered. A final sprinkle of flaky sea salt is the crowning touch.
Expert Tips for a Flawless Finish
- Chill Thoroughly: Don't rush the chilling process. Allowing the cups to set completely in the refrigerator ensures they firm up beautifully and are easy to handle.
- Embrace Flaky Salt: Seriously, don't skip the flaky sea salt. It truly enhances the flavor profile, balancing the sweetness and adding a gourmet touch.
- Room Temperature Enjoyment: While delicious straight from the fridge, allow your peanut butter cups to sit at room temperature for 5-10 minutes before serving. This softens the chocolate and filling just enough for the most luxurious texture.
Making Ahead and Storing Your Delicious Creations
One of the many virtues of homemade peanut butter cups is their make-ahead convenience, making them ideal for busy schedules or upcoming celebrations.
Preparation for Parties and Peace of Mind
During festive seasons or when hosting friends and family, anything that can ease your kitchen workload is a blessing. These cups are perfect for making in advance, reducing stress and ensuring you have a delightful treat ready to go. You can easily whip up a large batch and store them, leaving you more time to enjoy your guests and the festivities. To learn more about seamless preparation, explore tips on how to Make-Ahead Homemade Peanut Butter Cups for Holidays & Guests.
Optimal Storage for Lasting Freshness
To keep your homemade peanut butter cups fresh and delicious:
- Refrigeration: Store them in an airtight container in the refrigerator for up to 2 weeks. This prevents them from absorbing any odors and maintains their texture.
- Freezing: For longer storage, freeze them in an airtight container for up to 3 months. When you're ready to enjoy, simply let them sit at room temperature for a few minutes to allow the filling to soften slightly.
Flavor Control for Your Perfect Batch
Remember that initial decision to use unsalted butter and control your salt? That's precisely what gives you the power to adjust the sweetness and savoriness to your liking. This nuanced approach ensures every batch of your homemade peanut butter cups is perfectly balanced, catering to your specific taste preferences and truly making them better than any store-bought alternative.
There you have it – the ultimate guide to creating easy homemade peanut butter cups that genuinely outshine their store-bought counterparts. With minimal effort, quality ingredients, and a few clever tricks, you can enjoy a treat that is purer, more flavorful, and infinitely more satisfying. So, go ahead, gather your ingredients, and prepare to indulge in a truly superior chocolate-peanut butter experience!
